Embalming Process
Jan 17, 2023.

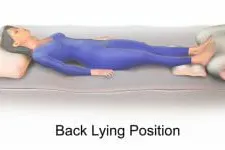
The practice of embalming has been performed throughout history for various cultural and religious purposes. As such, the techniques and materials have evolved over time, and can vary between regions. In general, embalming begins with the deceased body placed in the supine position (shown below) and the head is elevated. The process is performed as follows using various tools (shown below): Step 1: Verification of Death The first step in the embalming process is to verify whether the deceased is in fact dead. The presence of clouded eyes, rigor mortis, lack of a pulse, and general unresponsiveness. The identification of the deceased is verified via hand and foot tags. Step 2: Wash and Massage the Body The clothes and personal effects are removed and the body is then sanitized using an antimicrobial detergent. The orifices (e.g., mouth) are rinsed carefully. The limbs are massaged to alleviate the signs of rigor mortis. Step 3: Setting the Features The embalmer poses the eyes in a closed position using a specialized eye cap. The lips are shut either by suturing, wiring, or an adhesive. The face is shaved to remove any visible stray hairs. Step 4: Injection of Embalming Fluid The embalmer temporarily preserves the body by injecting chemicals into the vessels and peritoneal cavity of the body. There are several different methods of injecting embalming fluid (shown below): Arterial embalming: Arterial embalming involves injecting the embalming fluid into the carotid artery using a centrifugal pump to displace the blood, which drains through the right jugular vein. Any clots present in the vessels are massaged out to ensure that the embalming fluid is evenly distributed throughout the body. Although injecting the embalming fluid can typically be achieved via a single injection, in some cases, multiple injection sites are required to ensure that the embalming fluid is completely distributed. A typical body can hold approximately two liters of embalming fluid. The fluid is pumped into the body using a specialized machine that monitors the pressure of the vessels during the process. Although the machine is typically sufficient, a hypodermic needle is occasionally required to inject embalming fluid into locations that may not have been reached. Cavity Embalming: The body cavity is performed by making an incision in the abdomen above the navel. A trocar is inserted into the incision and the contents of the organs are aspirated. The peritoneal cavity is then filled with concentrated embalming fluid and closed by suturing or the use of a trocar button. Surface Embalming: Surface embalming refers to the application of embalming fluid to the skin of the deceased body to preserve damage suffered during autopsy, the removal of organs for donation, or disease (e.g., cancer). Step 5: Application of Cosmetics As a last step, the embalmer will apply a moisturizer and various cosmetics to hide a discoloration of the skin and achieve a more natural appearance of the body. Often, the embalmer will request a recent photograph in order to apply cosmetics in a way that will most closely represent the deceased individual. Since there is a lack of circulation, make-up is used to add color and depth to the skin and face of the body. The hair is styled using oils and gels and power may be applied to cover any unpleasant odors. The body is dressed in formal clothes for viewing purposes.